Task & File Management
As tasks pile up, the left sidebar offers several high-frequency management features: task views let you organize the task list by group, workspace, or timeline; the workspace file tree lets you browse files, review changes, and reference files in chat without leaving ZCode; and the wiki turns the current repository structure into a readable document you can revisit at any time.
Task Views
The view menu at the top of the task sidebar offers three ways to organize tasks:
- Grouped: organize tasks into custom groups, useful for topics, priorities, or phases.
- Workspace: keep tasks under the project they belong to.
- Timeline: browse recent work in reverse chronological order.
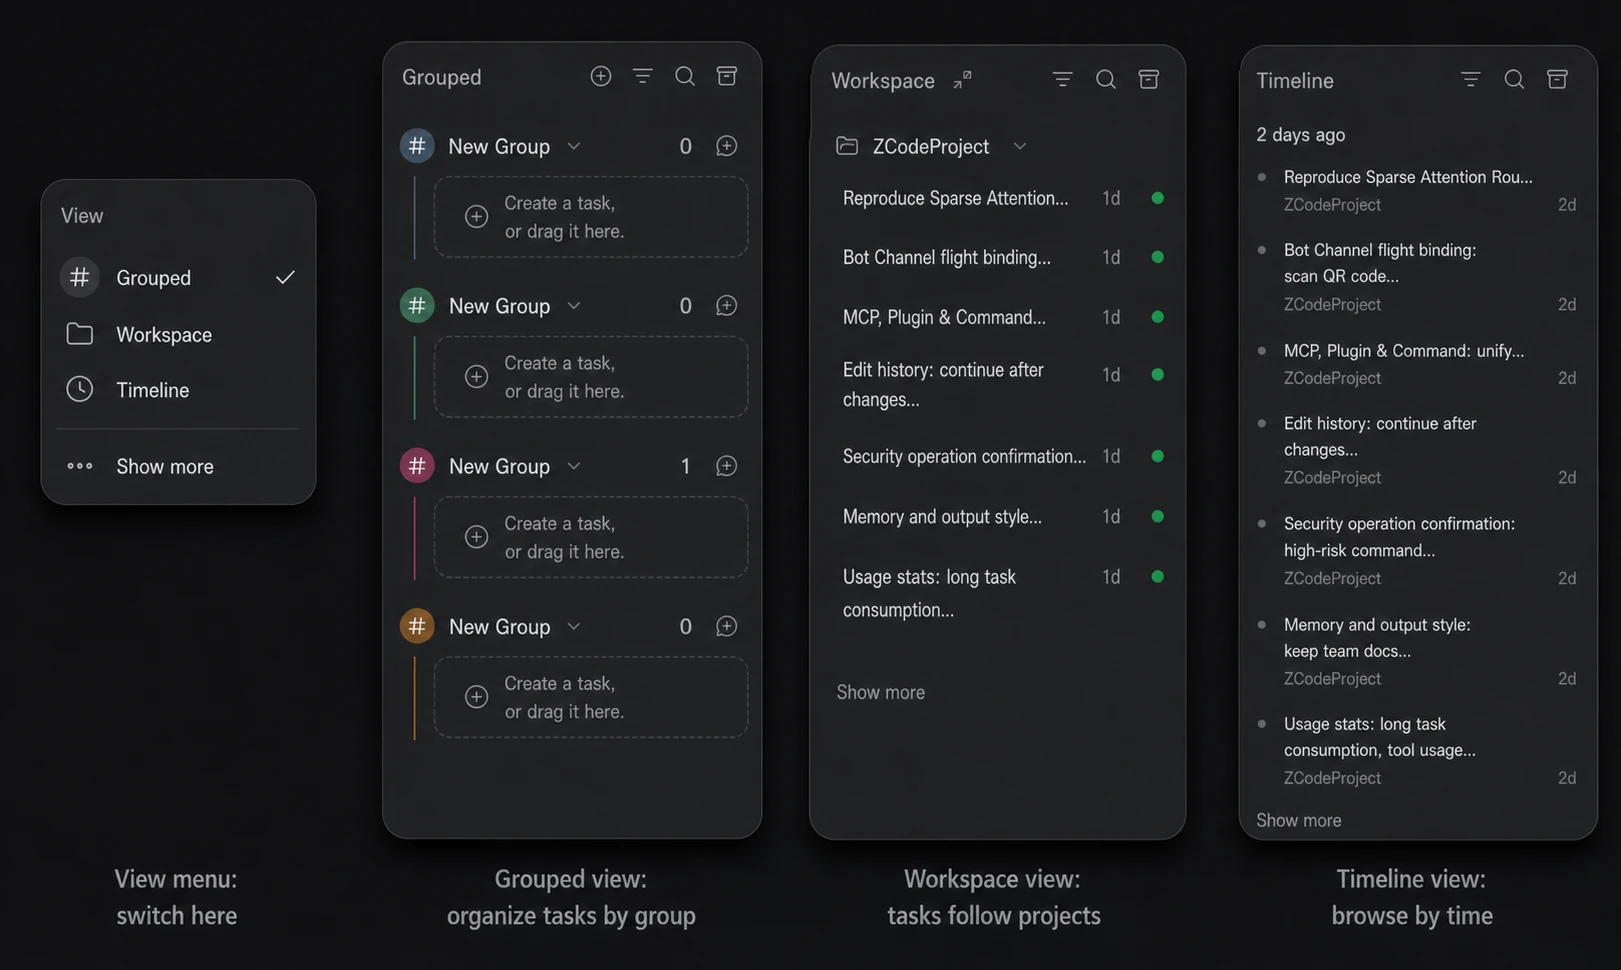
The controls next to the view menu cover three common actions:
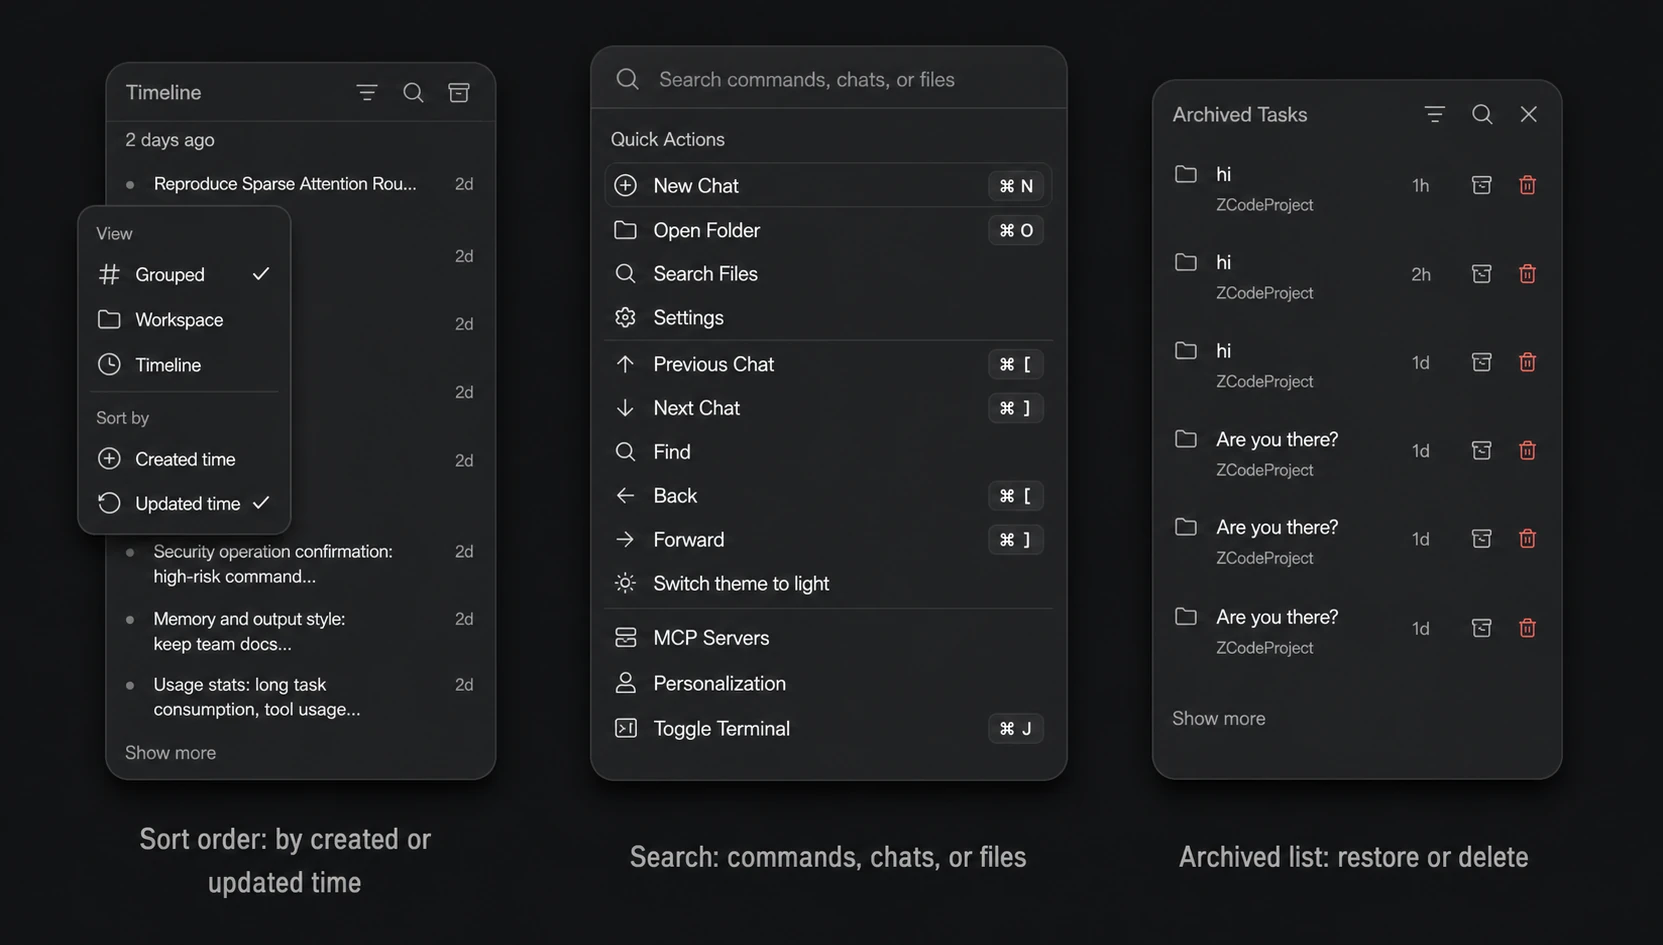
- Sort order: choose Created time or Updated time from the view menu.
- Search: click the magnifier icon to search commands, chats, or files by keyword.
- Archive: click the archive icon to open archived tasks. Completed tasks with no unread state, no pin, and older than the retention window (configurable as 3 / 7 / 14 / 30 days) become auto-archive candidates; each row in the list has two buttons on the right, Unarchive (restore to the task list) and Delete.
Task Groups
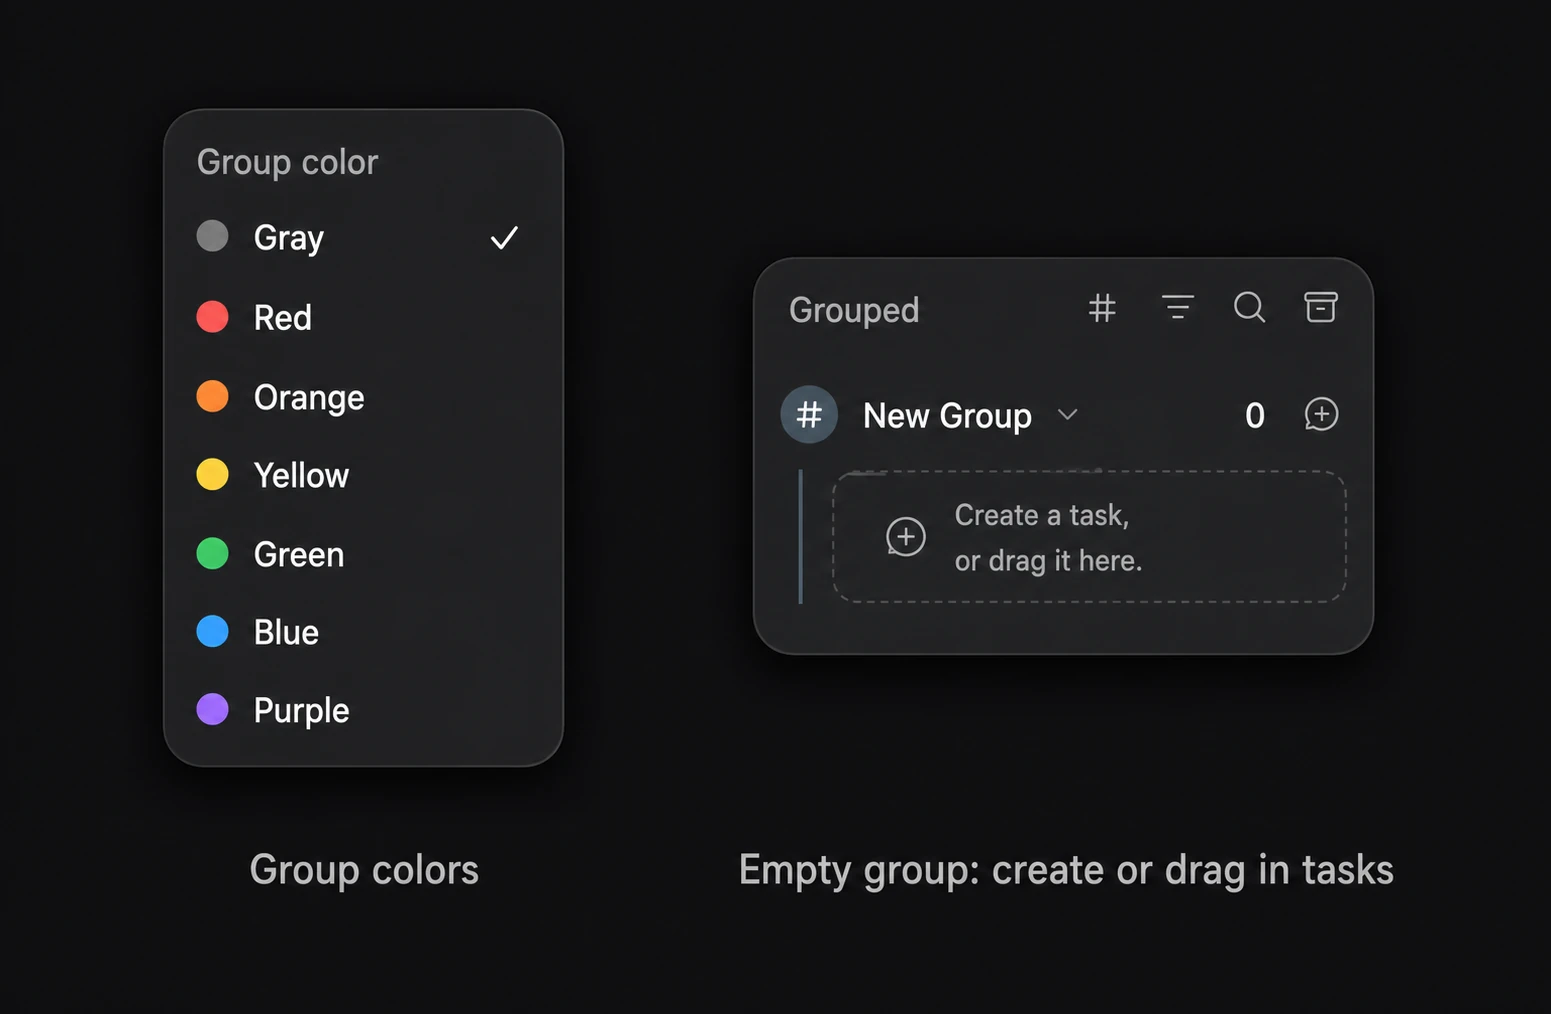
Switch the view menu at the top of the task sidebar to Grouped to organize tasks into custom groups.
Create and manage groups
- Click New Group and type a name
- Click the color dot next to the group title to pick one of 7 colors (gray / red / orange / yellow / green / blue / purple) — use colors to distinguish projects or priorities
- Click the group title to rename it at any time
- Right-click a group to choose Ungroup & Delete — this removes only the group itself; the tasks inside are kept and moved out
Organize tasks
- Drag and drop: drag tasks into a group, reorder tasks within a group, or drag group titles to reorder groups
- Context menu: right-click a task and choose Move to Group / Remove from Group when dragging is inconvenient
- Move to top: in a crowded group, right-click and choose Move to top instead of dragging all the way up
- Collapse and expand: click the triangle next to a group title to collapse one group, or use the buttons at the top of the list to expand / collapse all
Quick Actions
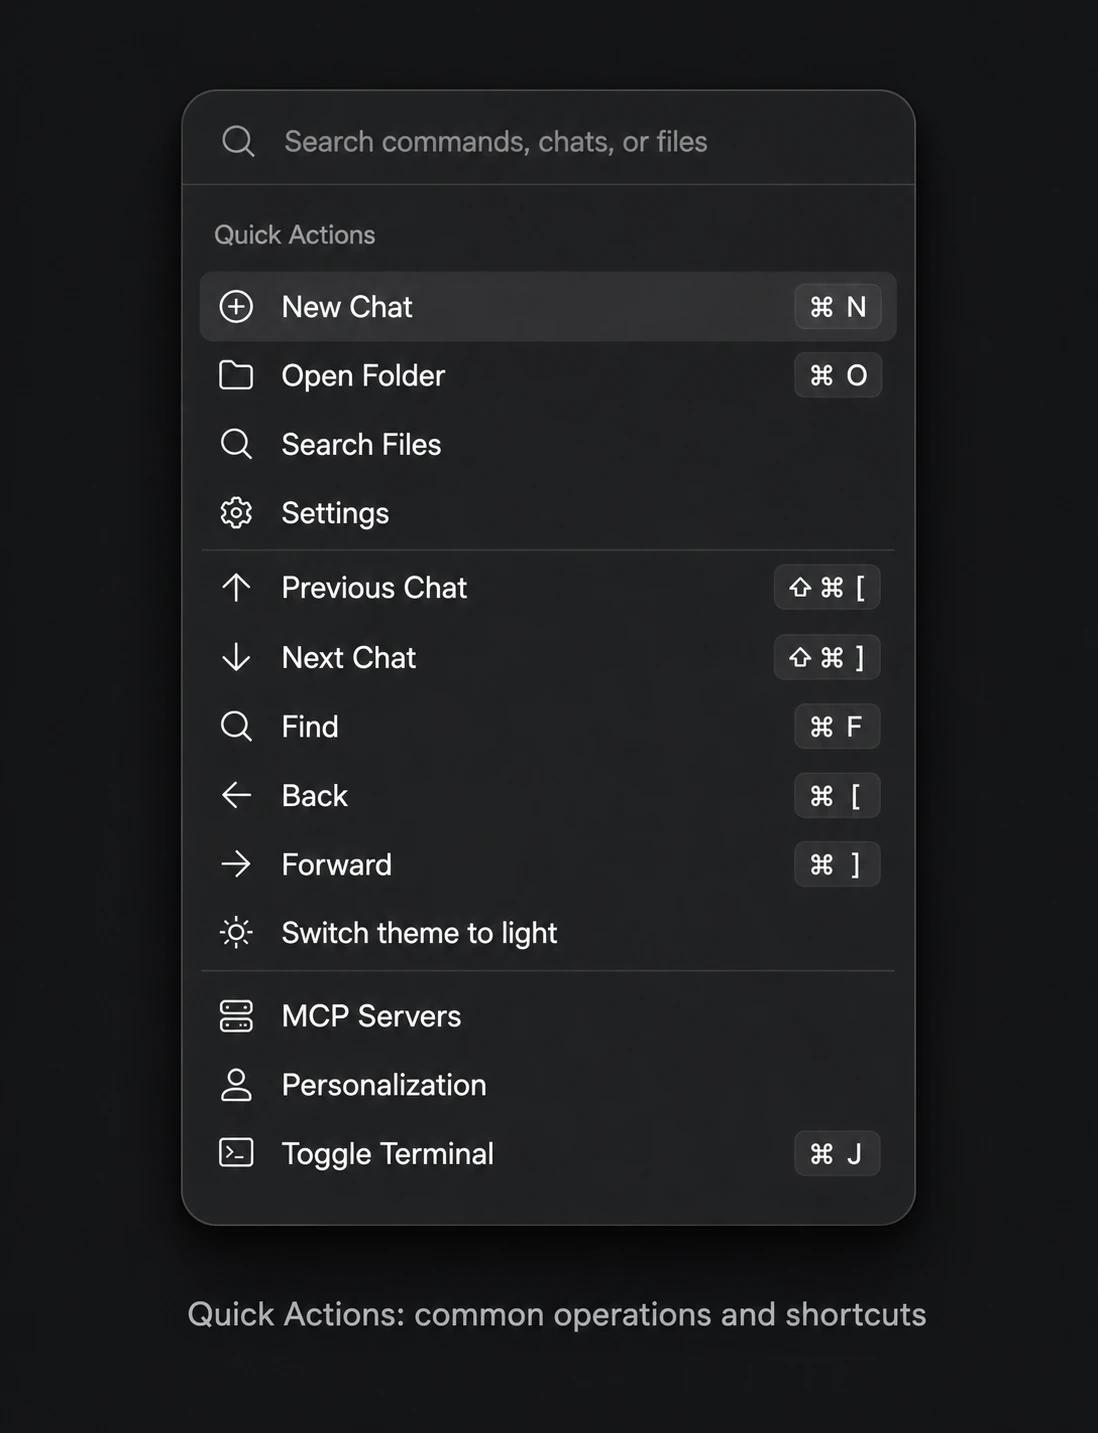
The search box at the top of the left sidebar is not only for finding tasks. Open it to show Quick Actions: new chat, open folder, search files, switch theme, MCP servers, toggle terminal, and other common operations can all be launched from the same panel, with shortcuts shown on the right.
Workspace File Tree
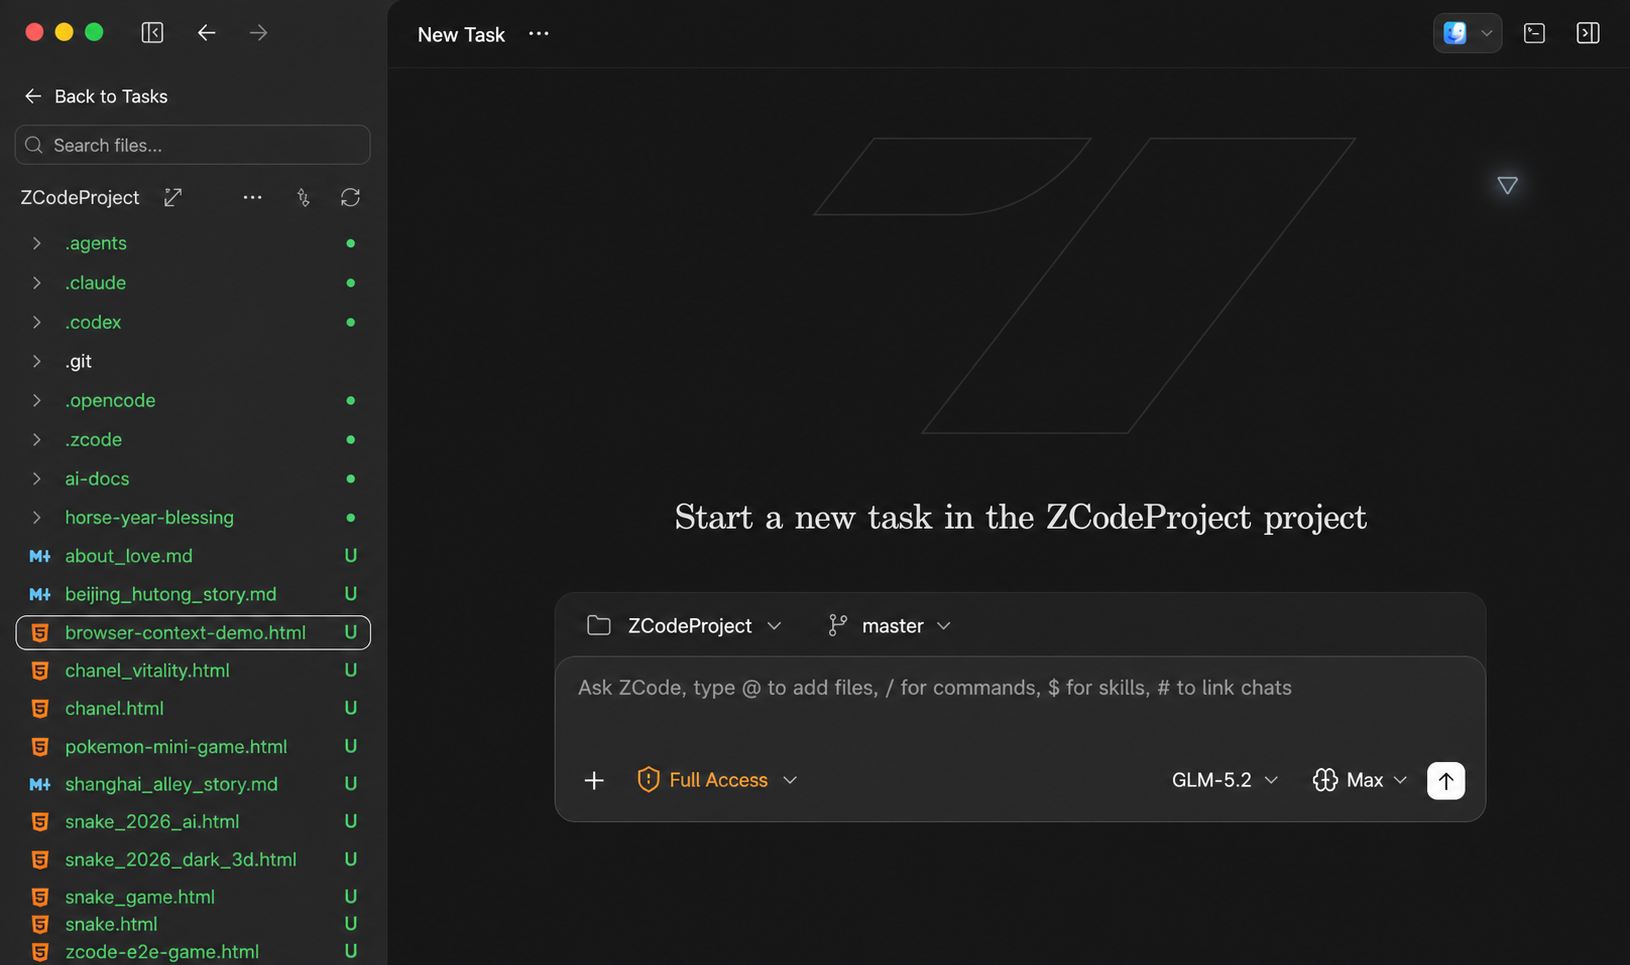
Click the file tree icon (View Files) on the right side of a workspace card to switch the sidebar to the workspace's file tree; click Back to Tasks at the top to return to the task list.
Browse and search
- Search files: the search box at the top filters by file name or path in real time
- Show changed files only: one click filters down to files with Git changes — great for code review or pre-commit checks
- Git status markers: files show their Git status (added / modified / deleted / renamed) on the right, and directories aggregate the change status of files inside
Open and reference
- Single-click a file to preview it on the right; double-click or press Enter to open it in the default editor
- Drag into chat: drag a file into the chat input to insert a file reference and have the agent work on that file
- Context menu: Open / Open With (choose an installed editor) / Add to Chat / Copy Path / Reveal in File Explorer
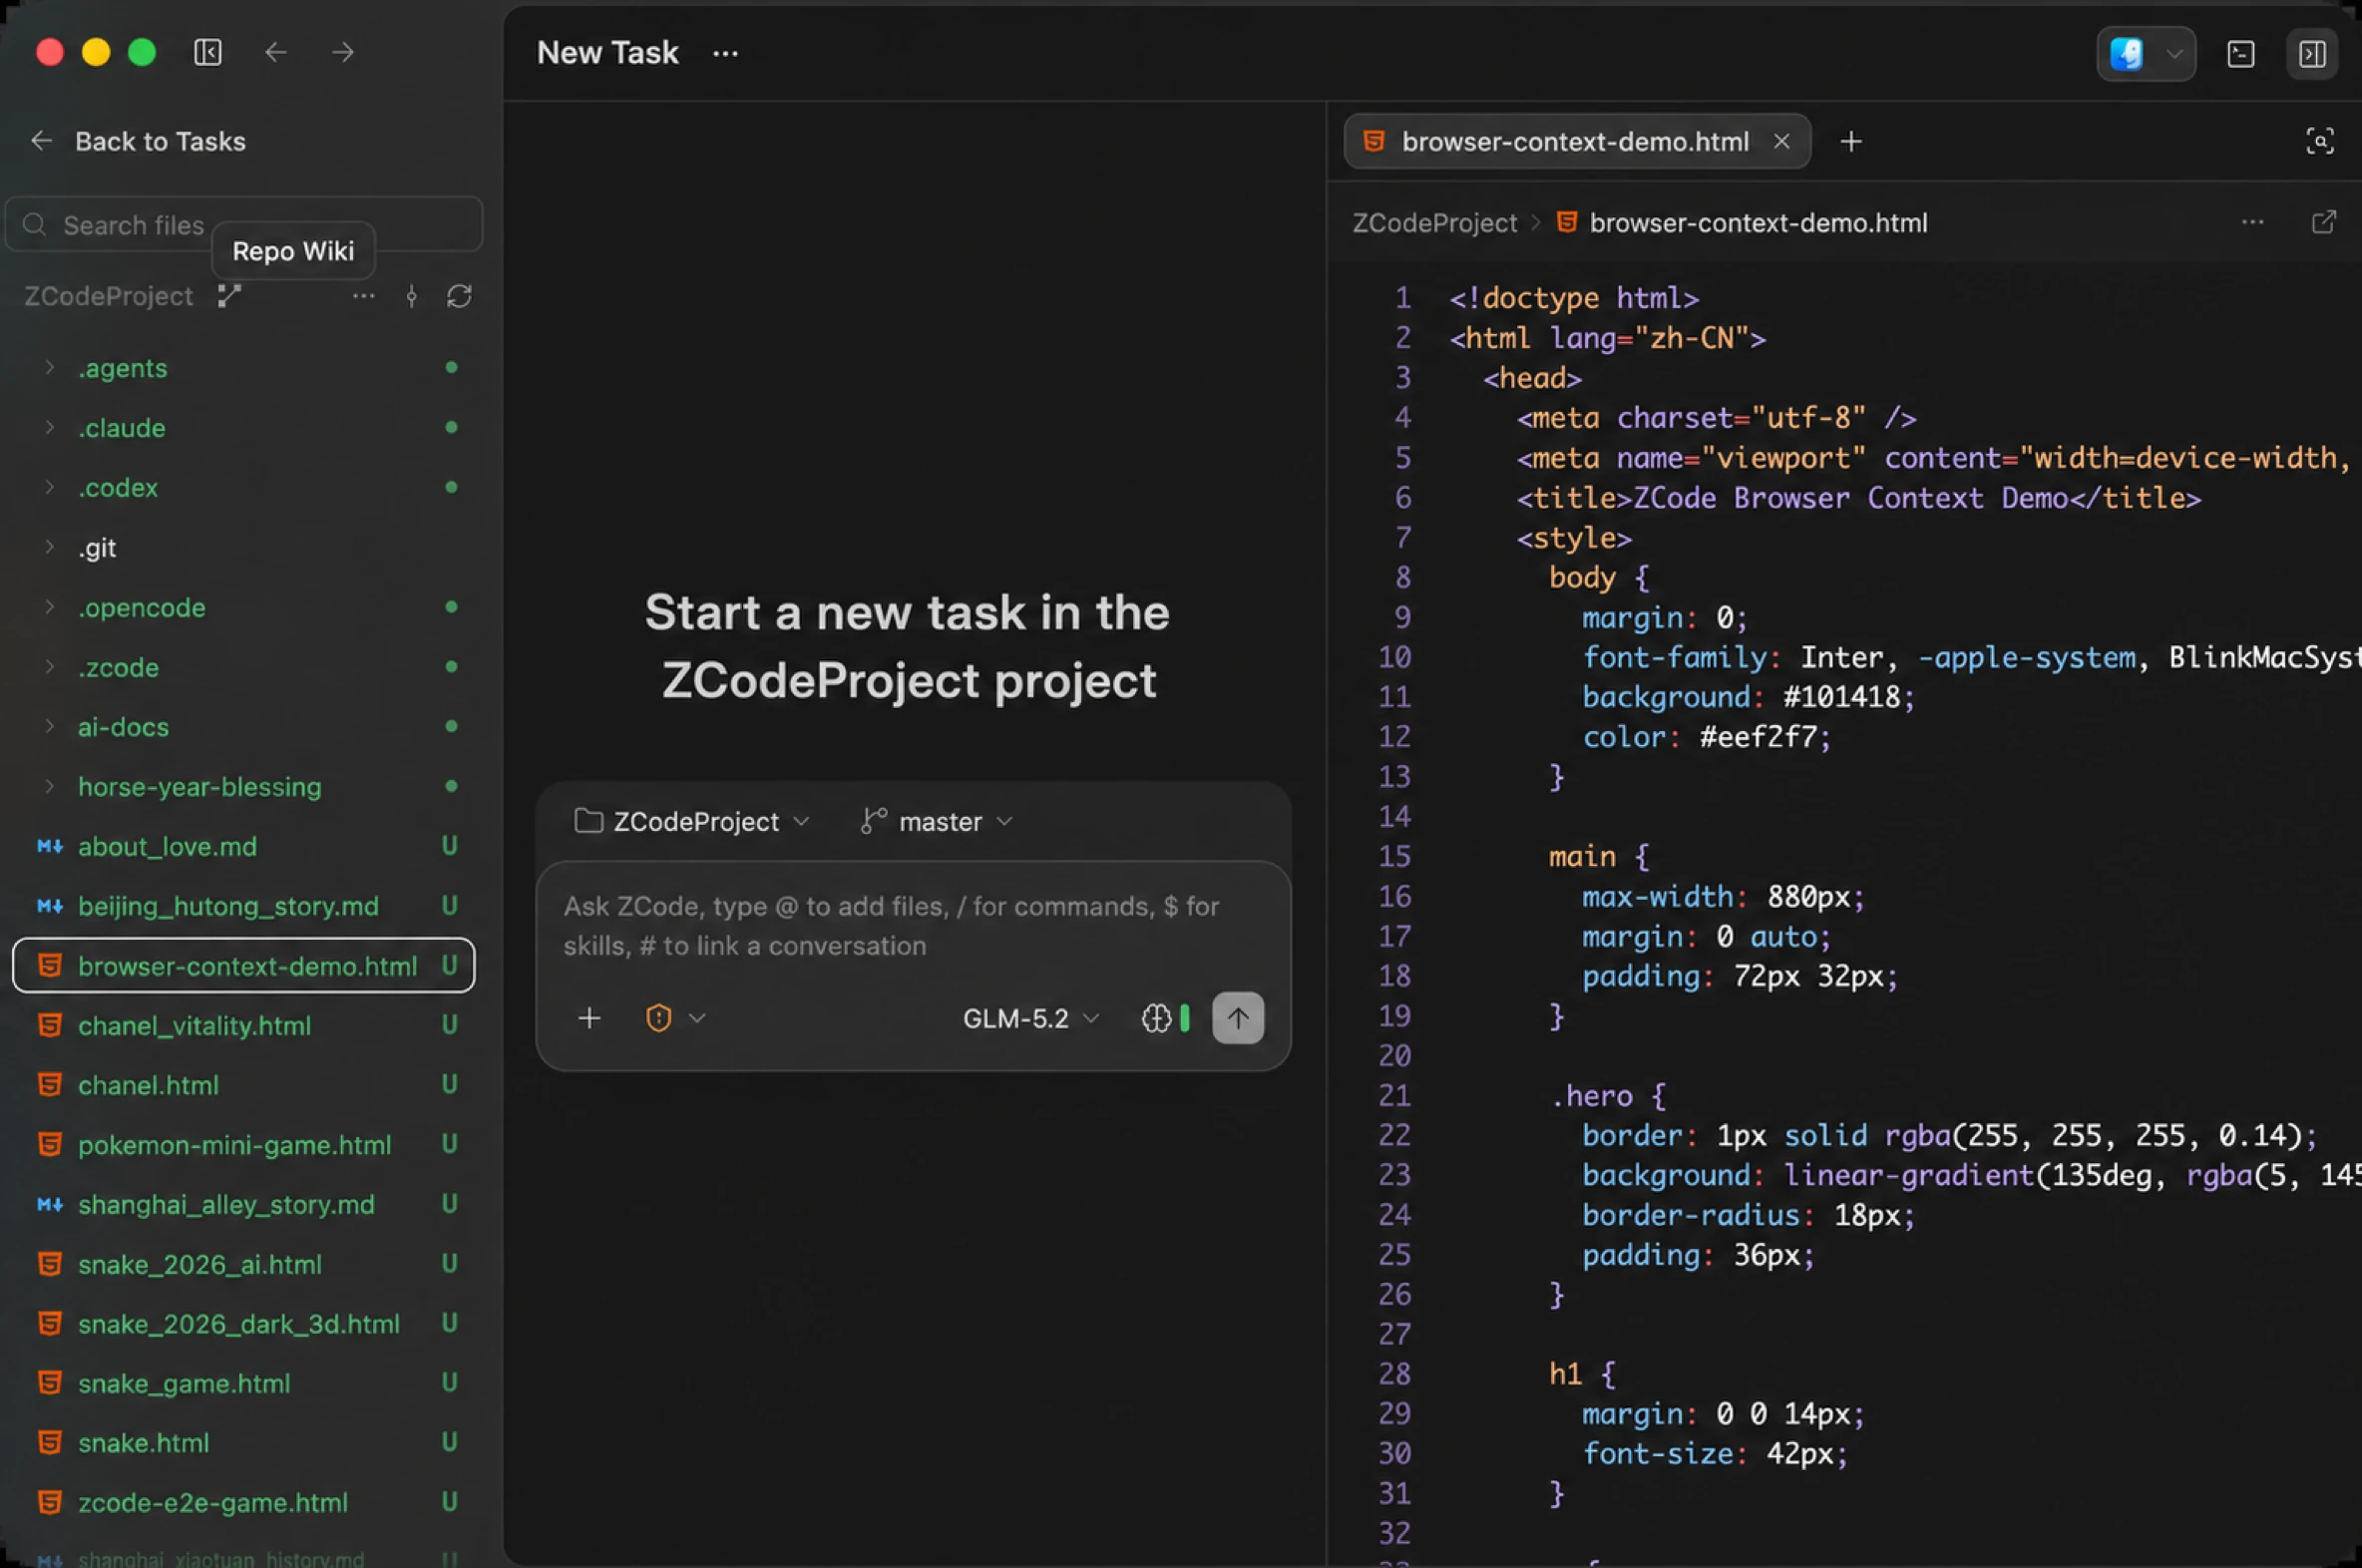
Tip: combine Show changed files only with Add to Chat to quickly feed this round's modified files to the agent for self-review or commit message generation.
Wiki
The Repo wiki icon next to the repo name at the top of the file tree generates an architecture guide for the current repository: what the project is, how the main flow runs, which modules matter, and how data moves through it — with every claim linked back to source. Especially useful when picking up an unfamiliar codebase. See Wiki for the full guide.
Git Graph
The branch switcher dropdown at the top of the workspace also has a Git Graph entry: a read-only view of your commit history, with branches drawn side by side and merges shown where they happened — handy for working out where a branch split off or when two lines came back together.
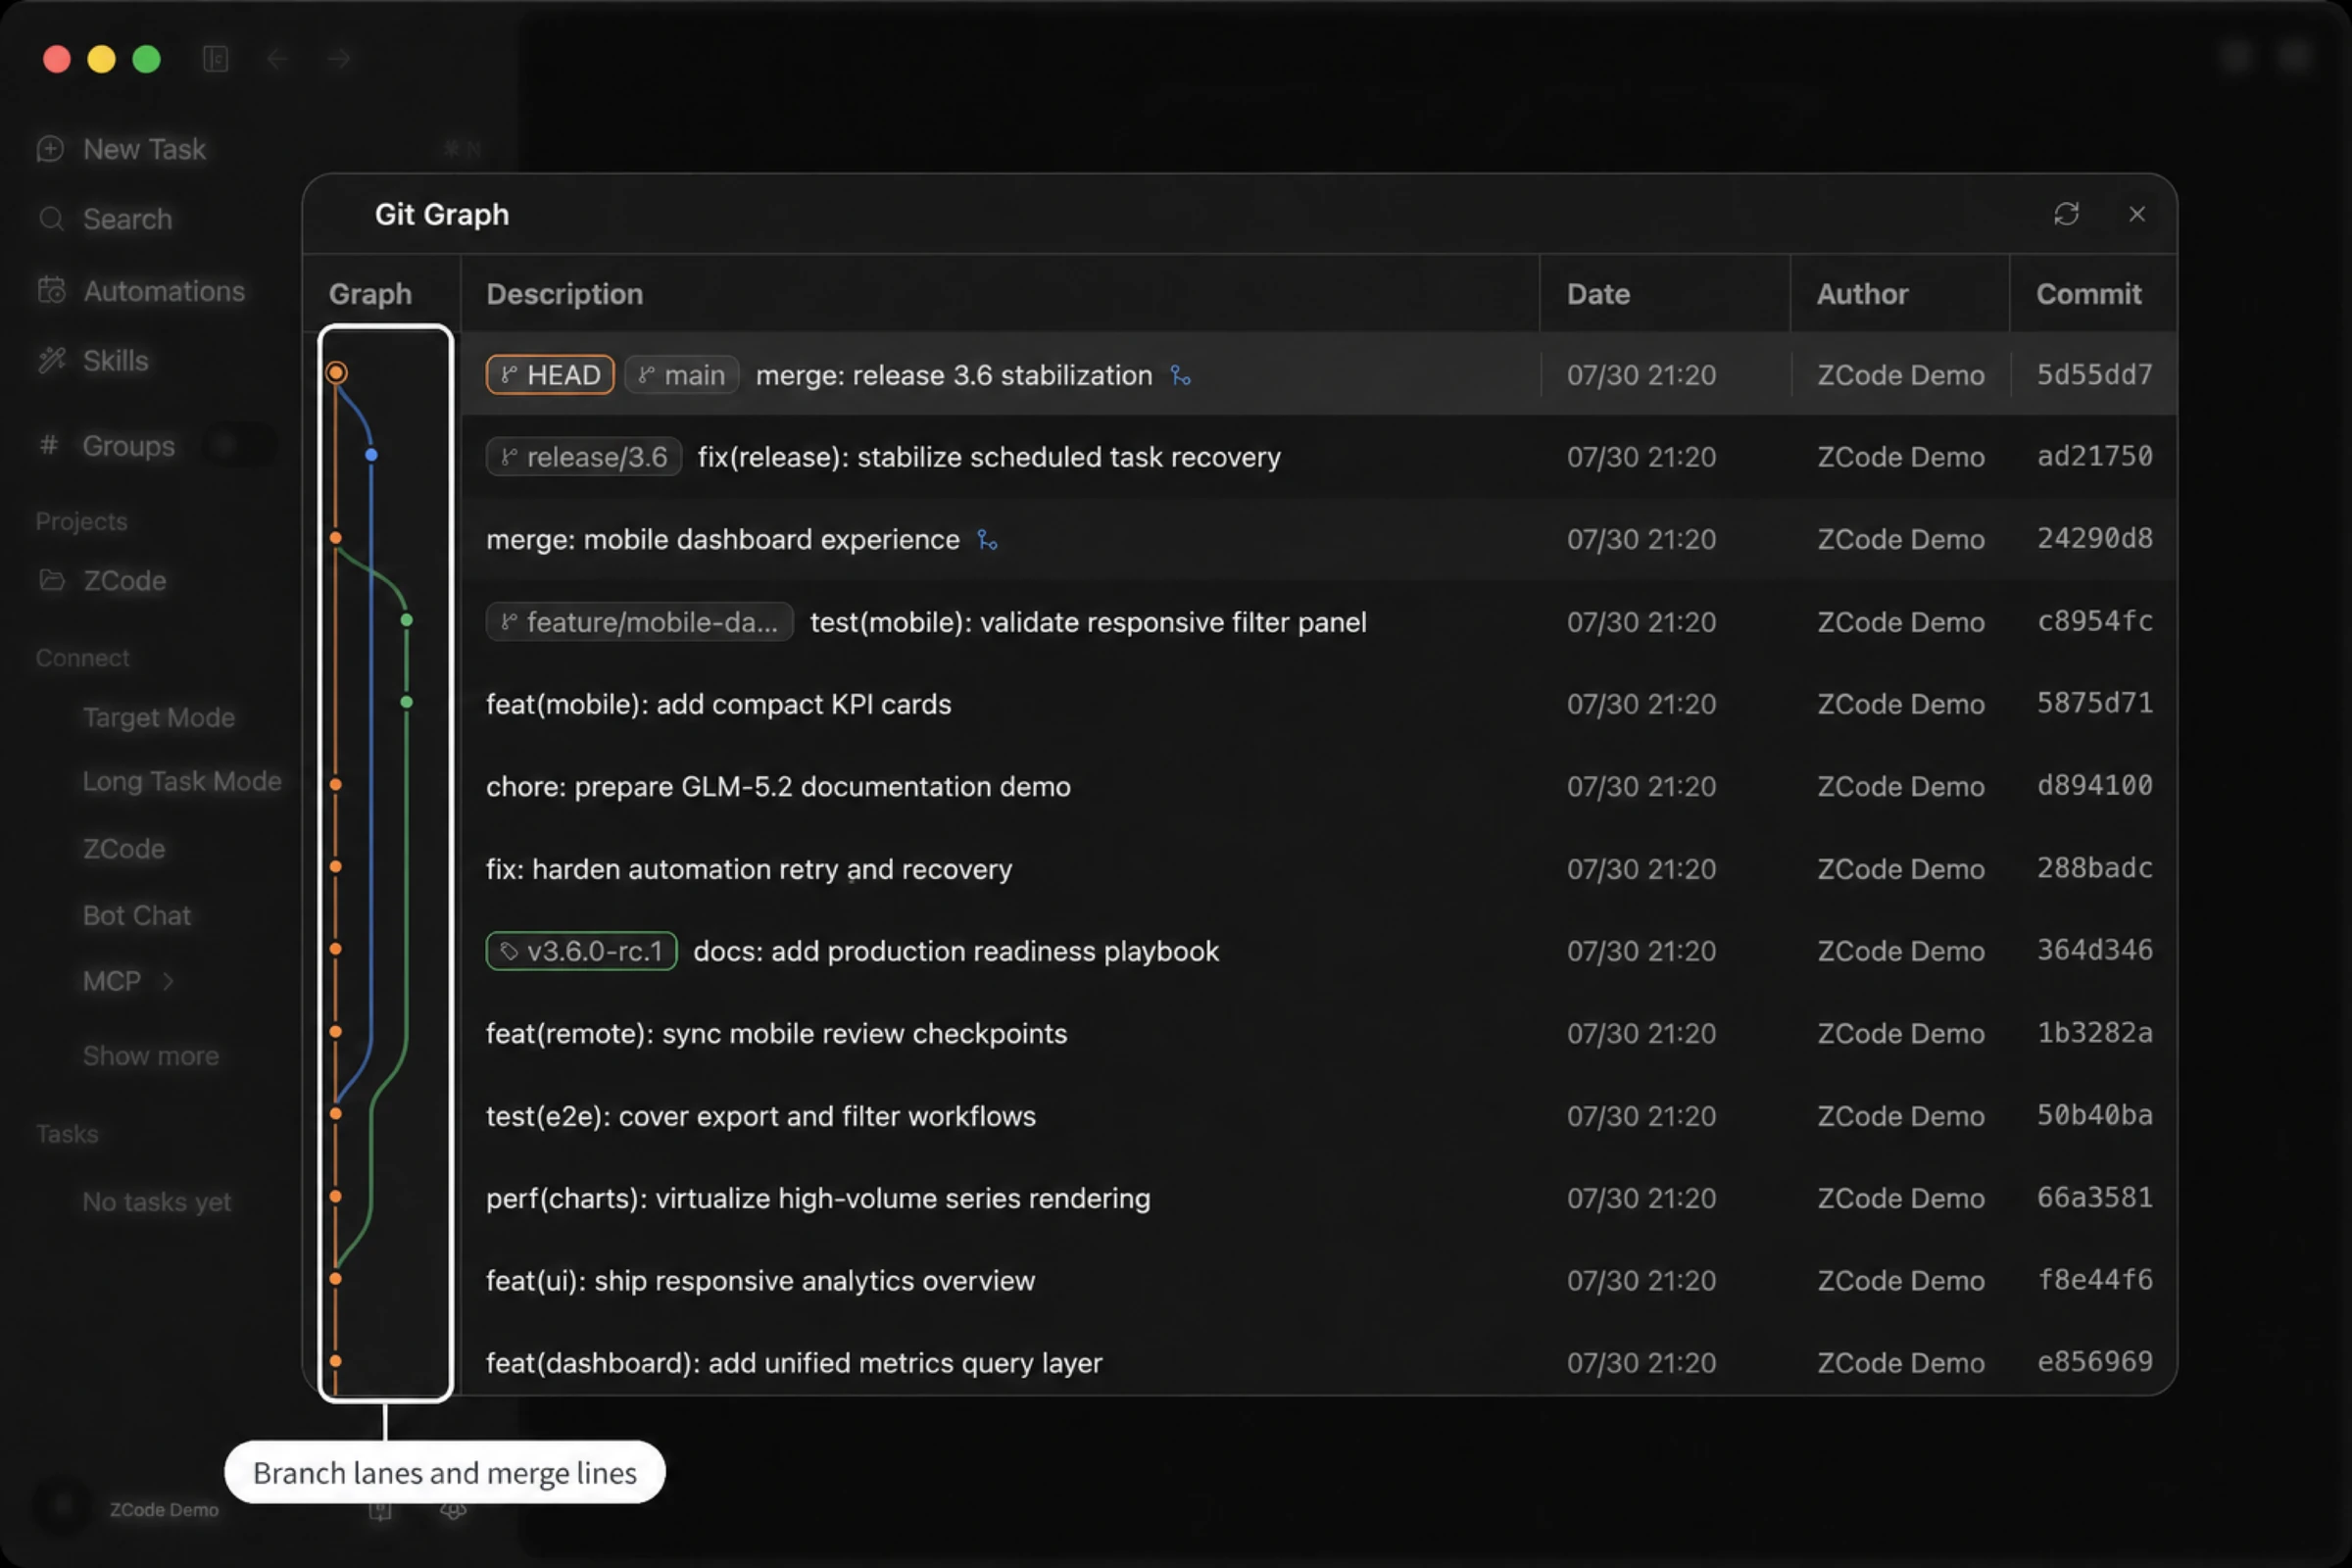
Selecting a commit shows its title, full hash, author, date, and parents alongside. The graph starts with your most recent commits, and Load more commits goes further back.
It's for viewing only: you can't switch branches or see the actual changes from the graph. Switching and creating branches live in the upper part of the same dropdown — if you have uncommitted changes when switching, ZCode prompts you, and offers to commit and switch in one step.