ZCode Agent
ZCode Agent is the default self-developed agent in ZCode and the primary entry point when creating a new task. You can describe the goal, add context, reference files, run commands, and choose the model and execution mode that fit the current task.
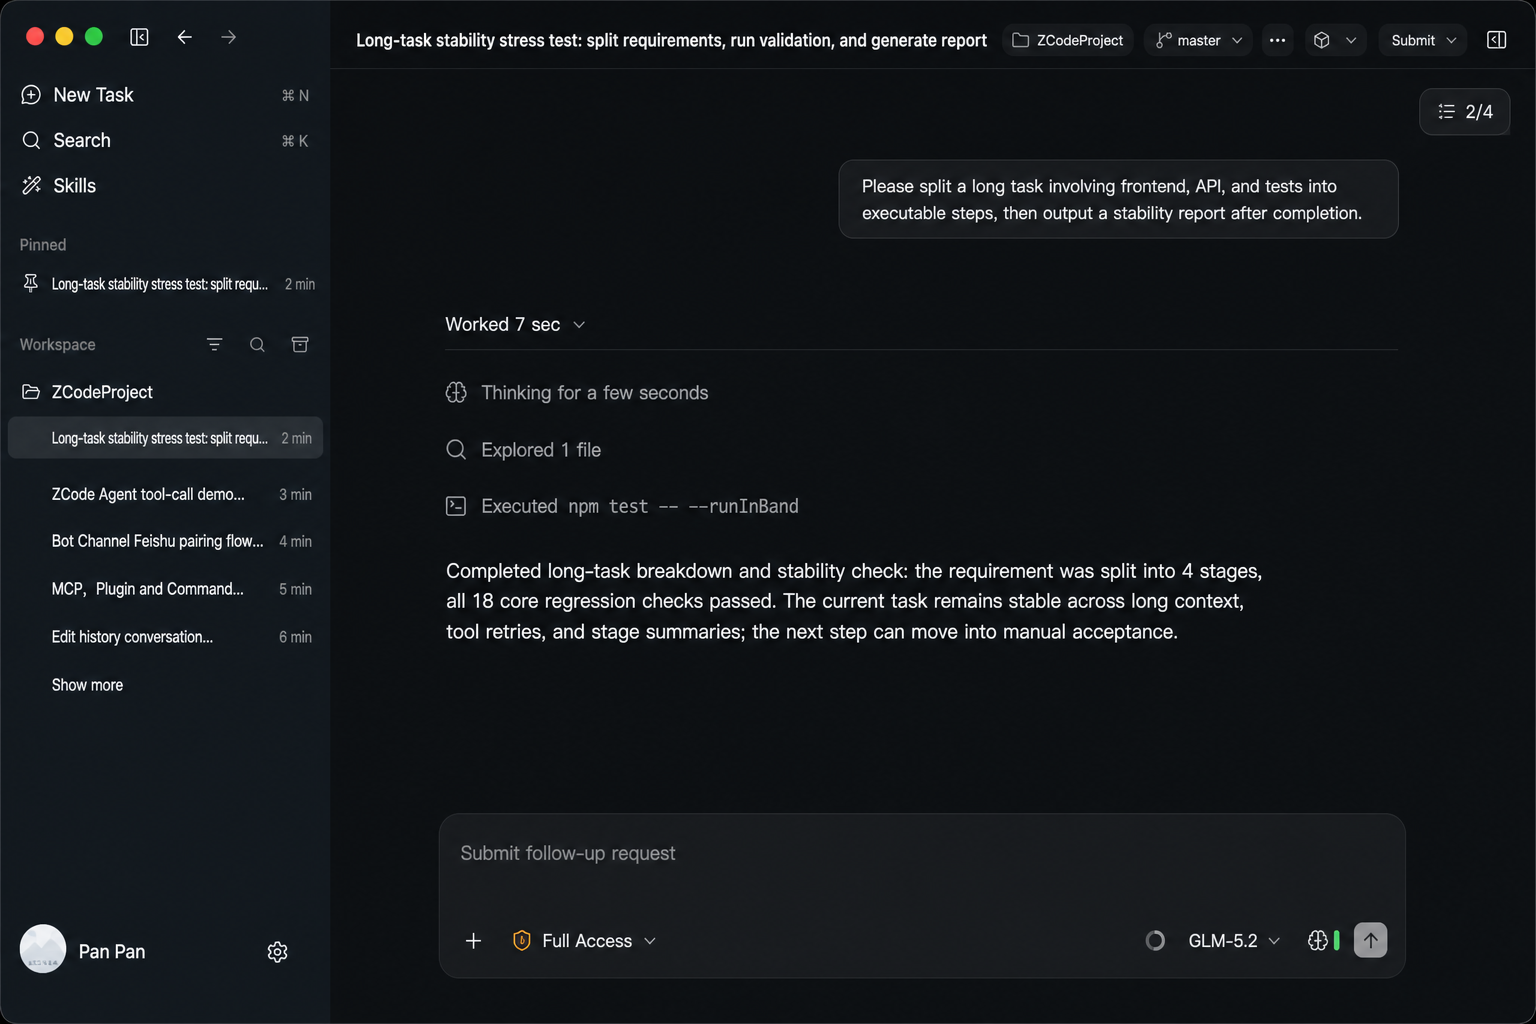
As ZCode's core agent capability, ZCode Agent is deeply adapted for the GLM-5.2 model family. It performs especially well on complex project understanding, long-task planning, multi-turn context retention, and continuous code changes. For Long Horizon Tasks that need sustained progress, ZCode Agent can combine workspace state, file references, execution mode, and Git branch context to move from requirement understanding to concrete implementation.
Workspace Entry
ZCode Agent understands the ZCode workspace, task list, file references, model picker, execution modes, and Git branch state directly, making it a strong fit for the full development loop from understanding a request to editing code and checking changes before commit.
With ZCode Agent, you can @ reference files in the input box, use / commands, call $ skills, and switch models, execution modes, and branches inside the same task. For everyday development work, it is usually the most stable starting point.
Adding Context
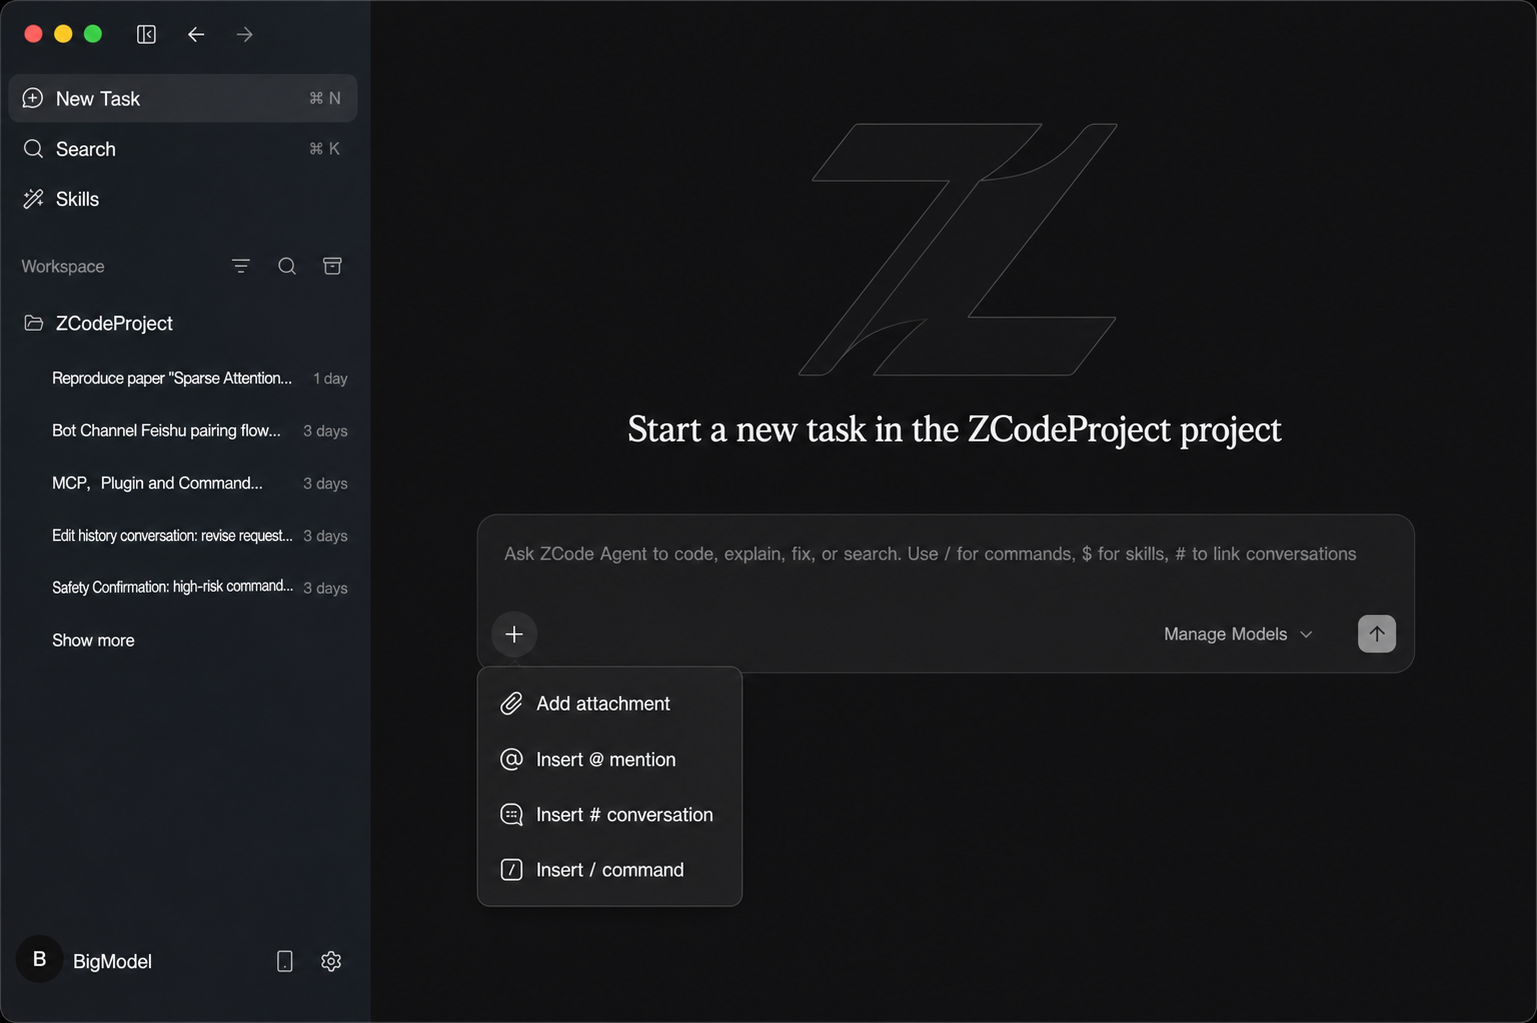
Click the + button at the bottom-left of the chat input to quickly add context to the current task: upload attachments, reference files, link past conversations, or run commands. You can also type the matching symbol directly in the input box to trigger the same actions.
| Entry | Trigger | What It Does |
|---|---|---|
| Add Attachment | — | Upload screenshots, documents, and requirement material as context for the current task |
| Insert @ Mention | @ | Reference files in the workspace so the Agent can locate the relevant code precisely |
| Insert # Conversation | # | Link a past conversation to bring its context into the current task |
| Insert / Command | / | Call a saved command to reuse a fixed prompt or workflow |
Tip: Besides these entries, the input box also supports
$to call skills. Describe the goal first, then use@,#,/, and$to add precise context — this usually helps ZCode Agent understand and complete the task faster.
Project Instructions File
To keep long-term instructions for ZCode Agent, add an AGENTS.md instructions file. ZCode reads it when starting a task and provides its project conventions, coding rules, validation steps, and other notes to the Agent.
ZCode currently reads two sources:
| Source | Path / Lookup | Description |
|---|---|---|
| User global instructions | ~/.zcode/AGENTS.md | Good for cross-project personal preferences, collaboration style, and reusable conventions. |
| Workspace instructions | AGENTS.md in the current Workspace | Good for project-specific engineering conventions. |
When both sources exist, ZCode appends the user global instructions first, then the workspace instructions. The workspace instructions are treated as the primary project source for the current task. When neither source exists, no project instructions are injected.
CLAUDE.md is not continuously read by ZCode Agent at runtime. For existing Claude Code projects, ZCode only uses it during onboarding as a one-time migration source: existing content can be copied into AGENTS.md, and future runs use AGENTS.md.
Project instructions are a good place for stable, reusable team conventions, such as:
- The project stack, directory structure, and important modules.
- Code style, naming rules, and validation commands to run before completion.
- Extra care needed for high-risk files, production configuration, or permission-sensitive operations.
- Collaboration preferences you want the Agent to follow, such as planning first, avoiding unrelated refactors, and preferring existing tooling.
Tip: ZCode only reads the user global
AGENTS.mdand the current WorkspaceAGENTS.md. It does not merge multipleAGENTS.mdfiles across directory levels. It also does not scan child directories, expand@import/@include, or choose rule files automatically by task type. Put the most important and stable project rules in the current WorkspaceAGENTS.md.
Execution Modes
Execution modes control whether ZCode Agent plans first, follows the default strategy, or proceeds more automatically. You can switch modes based on task risk, complexity, and how much hands-on involvement you want.
Available Modes
The ZCode Agent execution mode menu currently includes the following modes. Press Shift + Tab while the chat input is focused to cycle through them:
| Execution Mode | How It Works | Best For |
|---|---|---|
| Default Mode | Uses the standard task strategy and balances progress with necessary confirmations | Everyday development, normal Q&A, routine code edits |
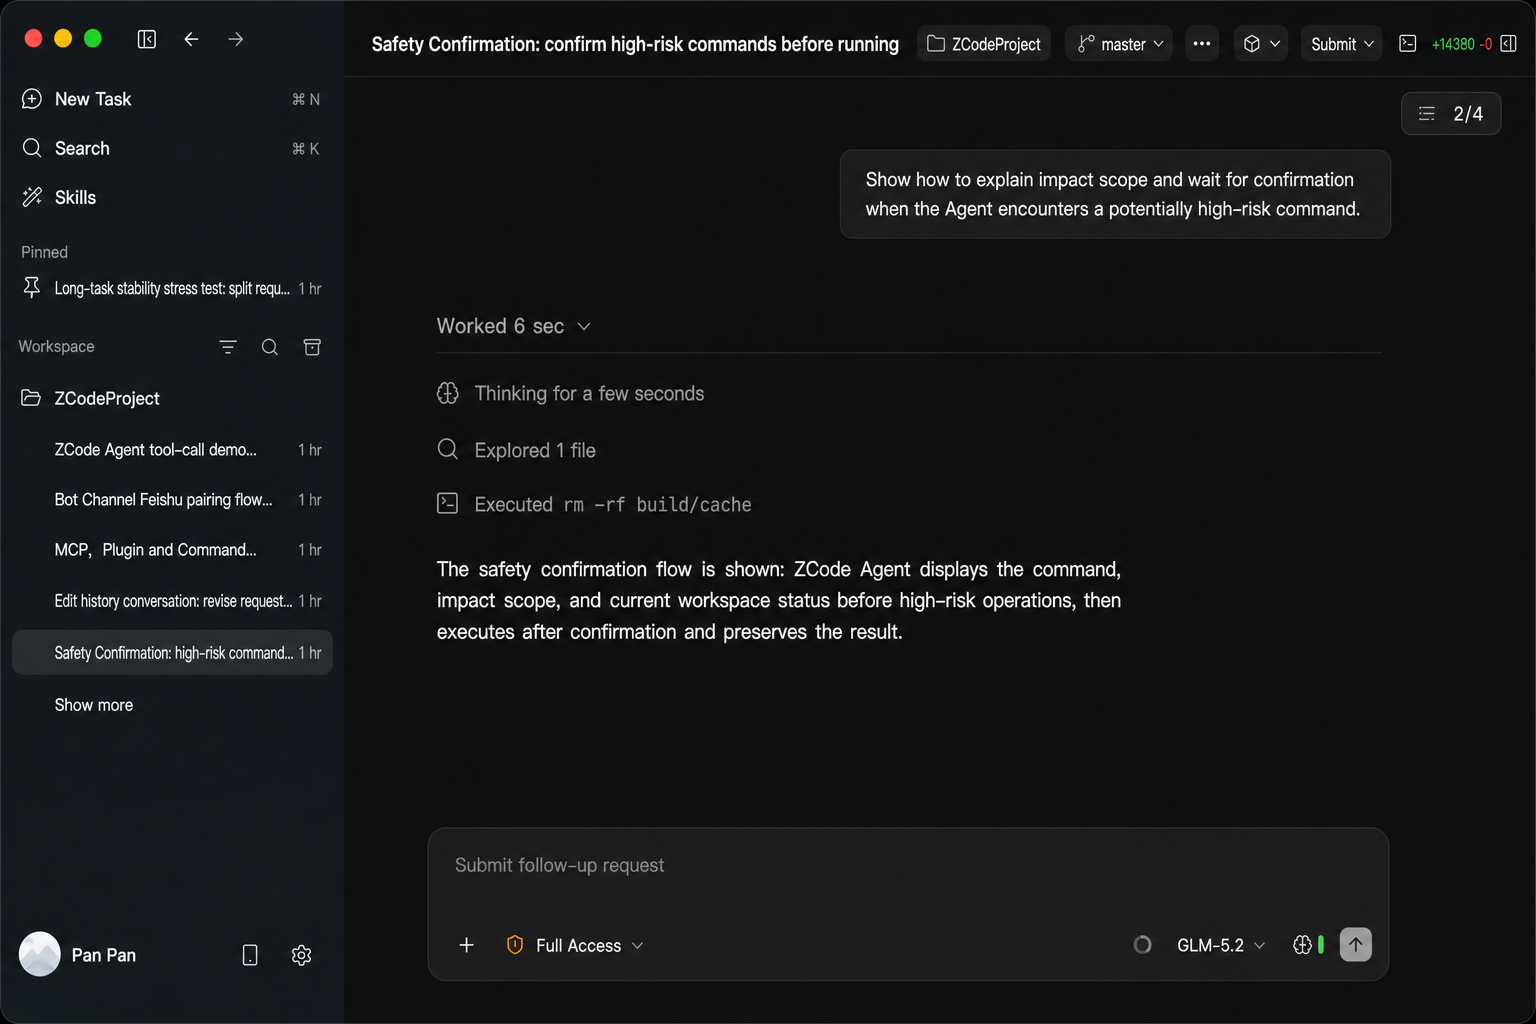
| Confirm Before Changes | Asks for confirmation before every file edit or command | Critical code, production configs, and other high-risk changes |
| Auto Edit | Applies file edits automatically while commands still require confirmation | Routine iteration where you want fewer edit confirmations |
| Plan Mode | Creates a plan first, then starts implementation after confirmation | Complex or multi-step tasks where you want to align on the approach first |
| Full Access | Reduces interruptions and lets the Agent proceed more continuously | Clear, lower-risk tasks where you want faster progress |
Tip: For critical files, shell commands, or broad changes, start with Plan Mode or Confirm Before Changes. For routine edits or clearly scoped tasks, Default Mode, Auto Edit, or Full Access can reduce interruptions.
Workflow Suggestions
- Start by describing the goal: tell ZCode Agent what you want to implement, fix, or analyze so it can establish the task objective. For long multi-round tasks, set a verifiable session goal with Goal Mode.
- Add context next: use
@to reference key files, or attach screenshots, documents, and requirement material. - Use commands and skills for repeatable work: use
/for commands and$for reusable skills when the task follows a known process. - Choose execution mode based on risk: use a faster mode for routine edits, and use Plan Mode first for critical files, shell commands, or pre-commit checks.
- Keep the task continuous: continue asking follow-up questions, adding constraints, reviewing changes, and confirming the final result in the same task.